
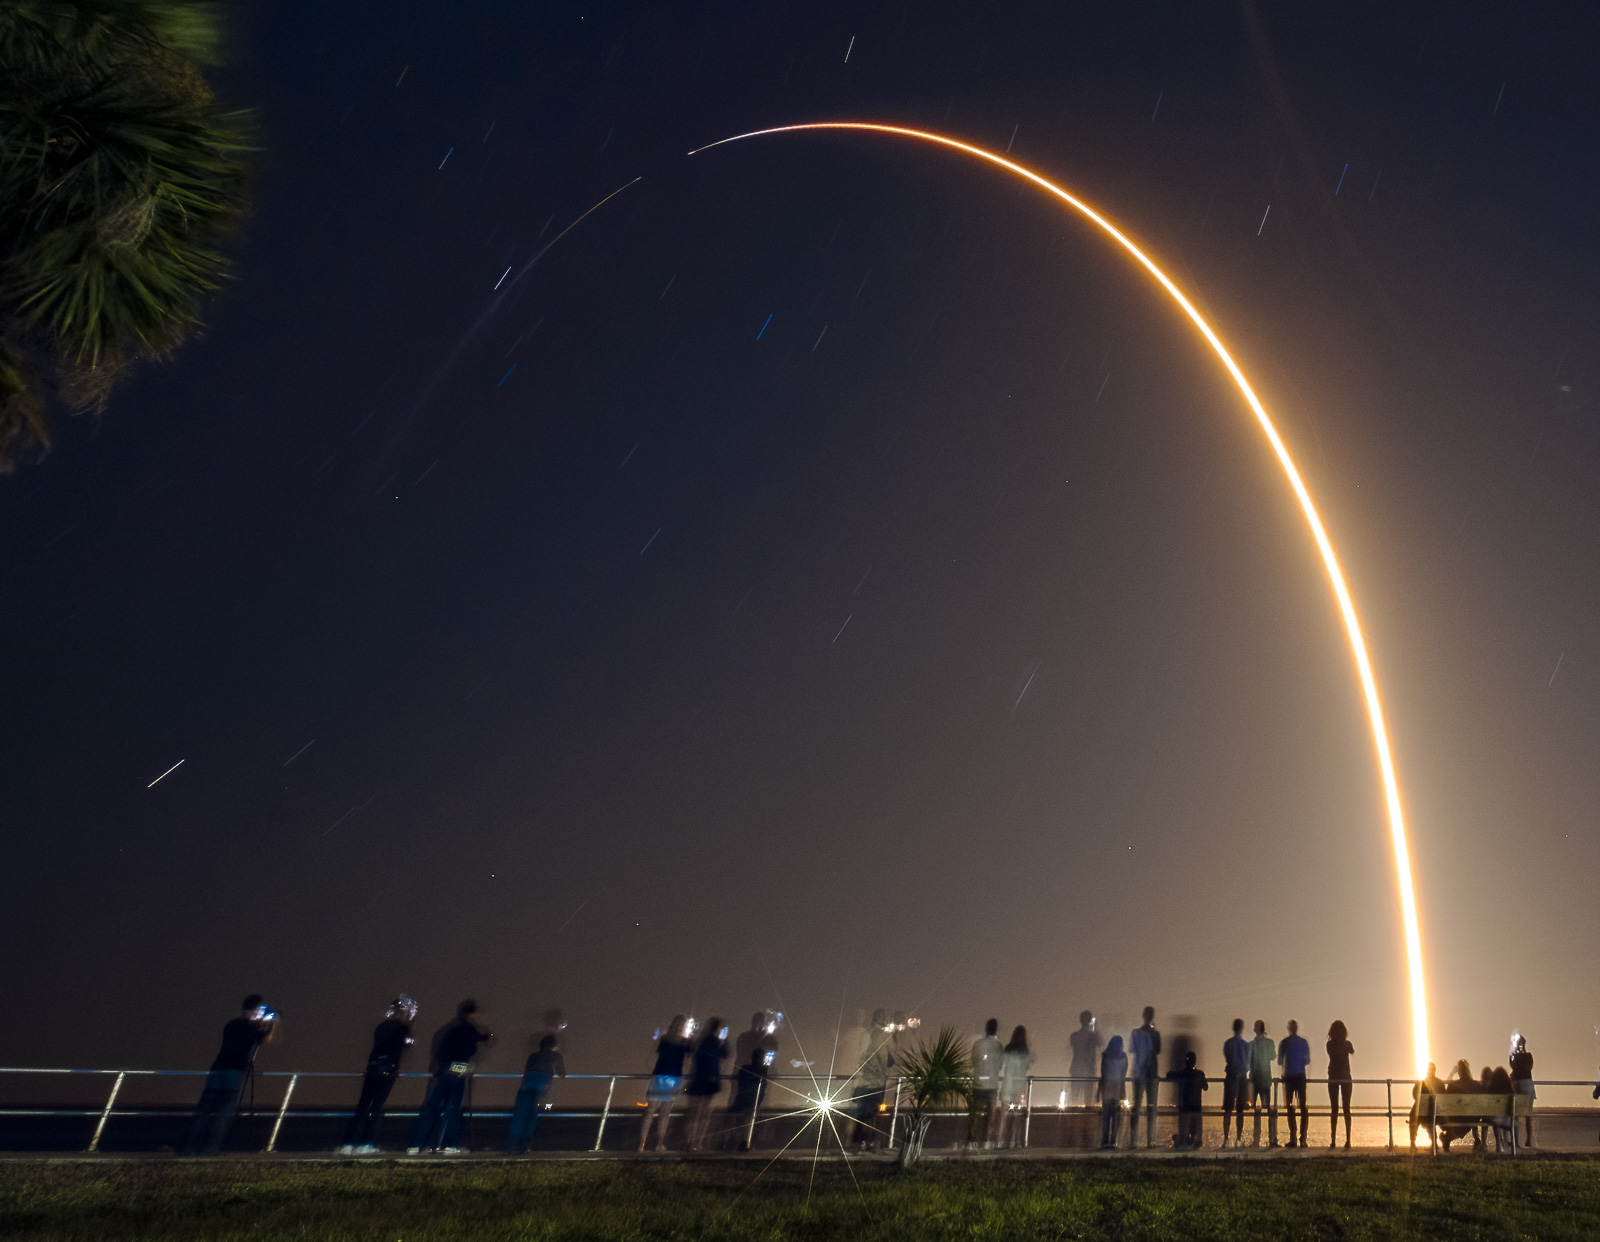
If you are visiting Florida and want to create a great launch photograph but the launch is at night, take a look at this relatively simple technique that will yield some awesome results: a launch streak shot.


Launch streaks are not difficult for nearly any photographer to create, and it doesn’t take any specialized equipment other than a wide-angle lens and a relatively inexpensive shutter release cable used to keep the shutter of your camera open for several minutes during the flight of the rocket. You’ll also need a tripod that can support the camera as well.
Below is a basic procedure and you too can create a memorable photo that will be one that you keep for years.
Here’s what you need:
| Equipment Checklist | |
|---|---|
| Camera | DSLR, mirrorless, or film camera |
| Battery | Fully charged — a dead battery mid-exposure is no fun at all |
| Lens | Wide-angle, preferably 24mm or less. A 35mm may work if you’re farther from the pad, but 24mm is best within 20 miles of the launch site. |
| Tripod | Sturdy tripod |
| Remote | Locking shutter release cable |
| Mindset | Patience |
That’s it. The release cable can be purchased on Amazon for less than $50 for most major brands, and for some cameras, the price is a lot less than that: I’ve used a $15 Nikon cable for years with different cameras.
Where To Go?
That’s up to you, and I have seen great launch streak shots taken from Orlando, Daytona Beach, even West Palm Beach and Tampa.
Click here for an Interactive Map of SLC-40 Viewing Locations
If you are visiting the theme parks in Orlando, I’d recommend making a short trip east and going to one of the local parks on US-1 north in Titusville, or perhaps on the beaches on Cape Canaveral or Cocoa Beach. There are other sites, such as KARS Park (limited hours, small admission fee) or the Banana River Bridge on FL-528W, but for the purposes of this article, let’s assume that you’re going to Titusville. It’s easy to get to, easy to get in and out of, is safe and has plenty of police nearby to guide traffic and ensure public safety.

You’ll need a clear view of the horizon and sky to to the general direction of the launch itself. For example, most SpaceX Falcon 9 launches carrying Starlink satellites are to the southeast, while every launch towards the International Space Station are in the opposite direction — to the northeast. If the launch is carrying satellites to geo-stationary orbit, it’s a safe bet that the rocket will fly close to due east from the launch pad.
One direction that rockets will never fly in Florida is to the west, over land. Unless something goes very, very wrong.
Talk of Titusville will always be free to access.
If you love what we’re doing, please consider becoming a monthly Supporter HERE.
When To Go?
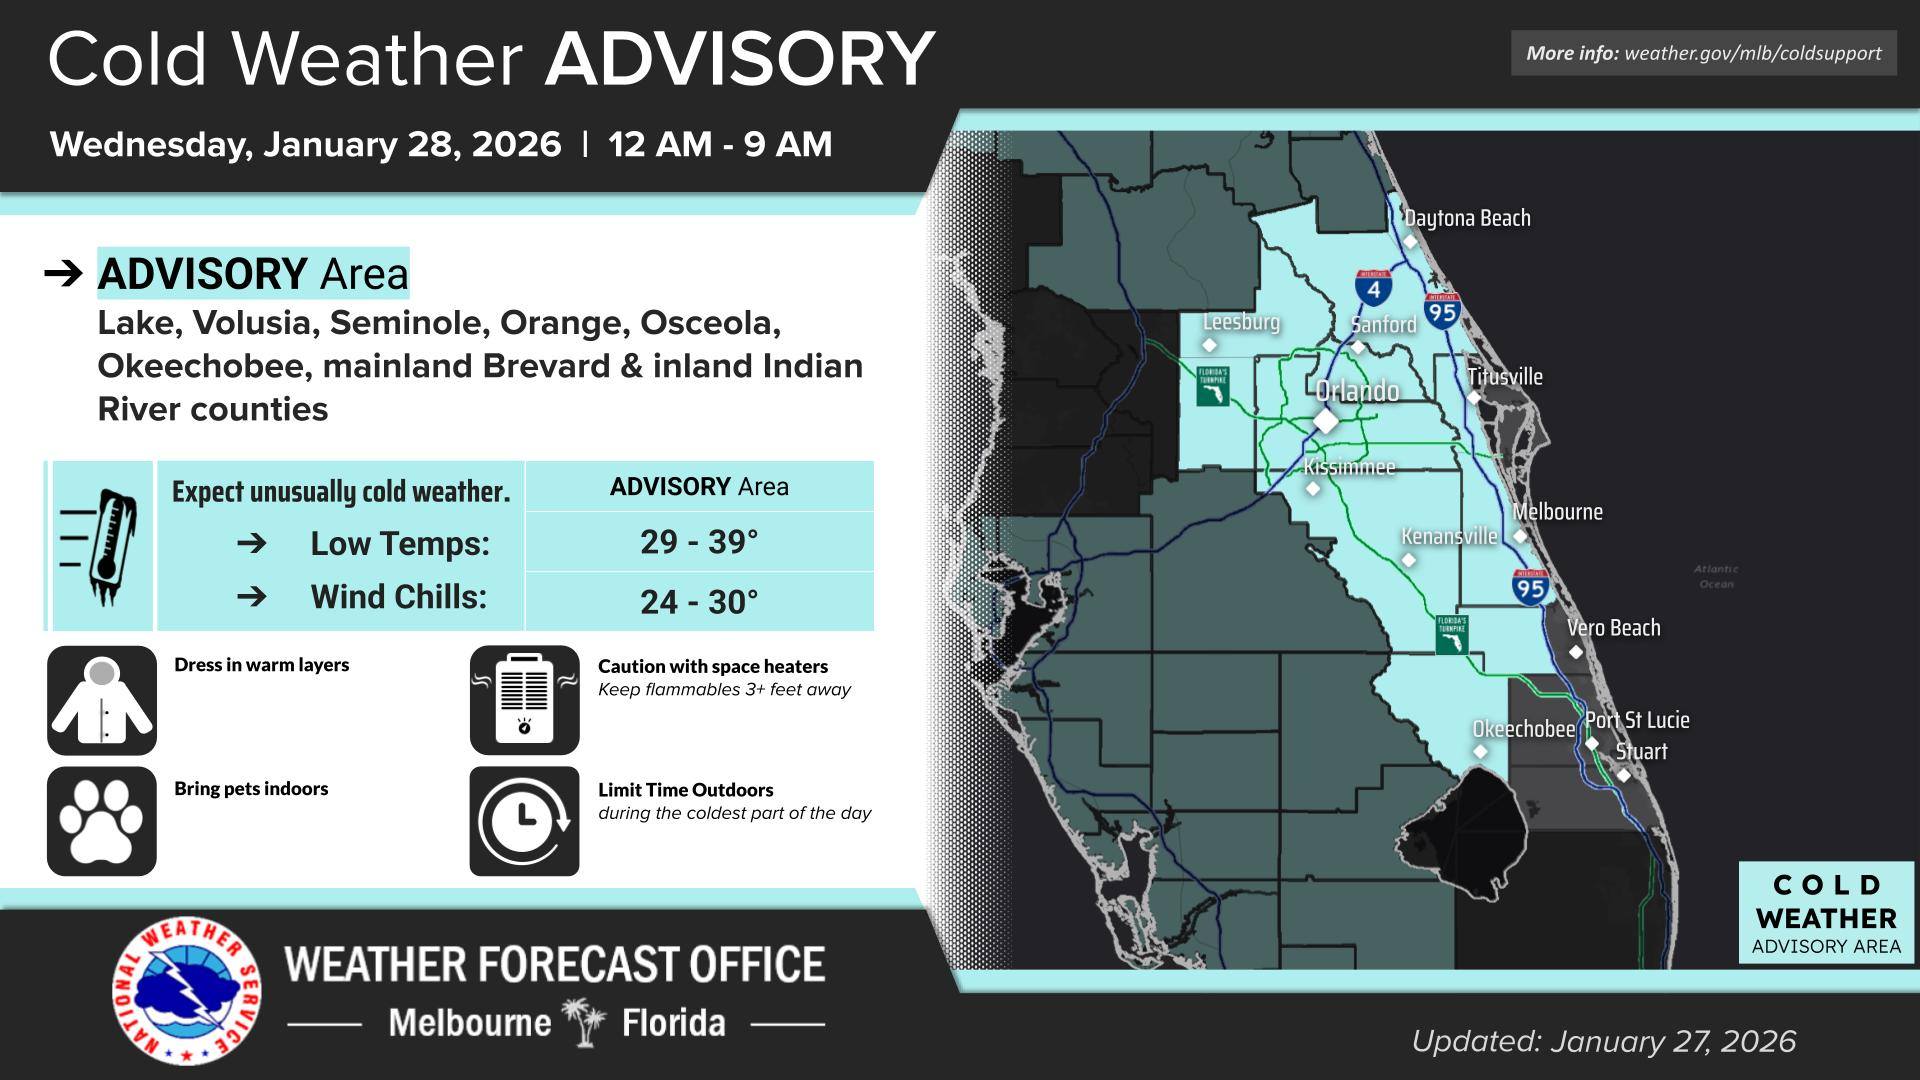
First things first: check the weather. Check the launch status. See below for more information on how to do that. Rockets don’t launch in thunderstorms or steady rain, and winds cancel launches almost as often as rain. Thunderstorm clouds (anvil clouds) near the launch pad? Scrub. Know before you go is the key phrase to remember here. And don’t forget: things change fast with Florida weather.
National Weather Service Radar
Assuming everything is still a “go” my personal recommendation is to arrive at your selected viewing location at least an hour in advance – and it is better to get there before that if you can swing it. You’ll want plenty of time to park, orient yourself to the launch pad, and set up your gear and check it twice. I also like to take a quick test shot before liftoff to ensure I’m ready to go and to check my composition.
The one-hour time buffer will work for a regular launch like a SpaceX Starlink mission. If it is a major launch like Artemis II, you’ll want to be in place at least 2-4 hours in advance. Tune in to local news for up-to-the-minute information.
A Word About Scrubs and Delays
I’ve been to launches that were scrubbed with a minute or less to go and a couple after ignition of the engines. Delays of an hour or more are also possible, especially when the weather is so-so. Be aware of that, and be ready for it to happen and hope it doesn’t.
Rocket launches are peculiar beasts, and they can be delayed or postponed at any time for any reason.
On the other hand, I have waited for launches that I was 100% certain would be called off thanks to weather. Then at the last minute, things were perfect and the rocket flew off the pad at the time that was planned days in advance. You just never know.
How Do I Get Updates While I Wait?
As long as you have a good signal on your cell phone (another reason I recommend Titusville), you should be able to keep up with the launch status relatively easily. That’s important to do, because as I mention above, rocket launches are quite often delayed or scrubbed (canceled for the day) if everything is not right. The weather has to be within acceptable limits, the rocket itself has to be in fully working order, and on top of that, the areas at sea and in the air of the flight path of the rocket have to be clear. In short, thousands of different things have to go right for a rocket to launch, but only one thing has to not be right for the launch to be scrubbed or delayed.
No one will remember a scrub or a delay, but no one will ever forget a launch failure.
Websites
It’s free to use, is accurate, and has really nice features like a countdown clock that comes in handy while I’m waiting to see watch liftoff. They have apps for both Android and Apple, as well as a website online that has the same information. They don’t charge for access, though the site and apps are ad-supported.
If you are a Facebook user, Space Launch Schedule also has an active user group that’s a good source of information and inspiration. Later on, you can share your photo(s) there as well.
This site is part of the Spaceflight Now, but it is largely fed by the same information service as Space Launch Schedule. The real difference is that Next Spaceflight can be quicker to update in terms of changing times or even scrubs — that’s because they have the Spaceflight Now team providing information. That’s not to say Space Launch Schedule is not timely, it is, but I think Next Spaceflight is a little quicker.

Spaceflight Now is a space news website and news service that also provides launch coverage on YouTube. They start about an hour before liftoff, and are an excellent source for up-to-the-minute status updates. SFN offers a countdown clock, views of the rocket and informative commentary by some of the best in the launch coverage business.

NOTE: Because it literally takes time for a live signal to travel from the Cape to YouTube’s servers and then back down to your phone, SFN’s video feed can be delayed anywhere from six to thirty seconds when you see it. That’s not any editorial decision by them, it’s simply a matter of physics. Refer to the Space Launch Schedule countdown clock for the most accurate time to liftoff.
There are other great sources of information, but for simplicity’s sake, I will only mention the two websites above. Between them you’ll know what you need to know when you need to know it, and that’s what counts the most. I recommend you explore both sites before you head out to the launch site, and that you familiarize yourself with how they work.
Setting Up For The Photograph
Once you arrive at the launch site choose where you will place your camera. I recommend being close to the water’s edge if you are on the banks of the Indian or Banana River, and to have some sort of foreground interest to give your photograph a sense of place. There are a lot of piers on the Indian River, for example. If you can’t find an object to put in the foreground, no worries, you’ll still get a great shot.
IMPORTANT NOTE: be aware of wildlife in or near the water. If you see or hear an alligator, find another spot. Don’t approach it and don’t disturb it.
Find the launch pad, if you can see it. (Some great streak shots don’t show the launch pad.) This can be tricky, and if you’re not sure and someone is nearby, ask them. Worst case, use Google Maps to orient yourself so that you’re aiming in the right direction.

This is where knowing the trajectory is critical: if the launch is to the south, you’ll want the launch pad on the left side of the frame of your planned photo. The rocket will travel right to left if your looking to the east. On the other hand, if the mission is towards the International Space Station, the rocket will be traveling right to left, so orient the launch pad to the right of your frame. If you’re at an equatorial launch (one to the due east from the pad) you’ll want to center the pad in your frame.
I tend to leave as much sky in the composition as I can, that keeps me from missing the top of the arc. This is a risk with longer length lenses.
Space Launch Schedule website has a link to a flight trajectory plot on Flightclub.io, another launch info site. Here’s one for Starlink showing it will travel to the southeast. If you are facing east, put the launch pad region on the left side of your composition.

Next, shift the camera to where the balance of sky is at least 75% of your composition. If you’re close to the launch pad – again, using the example of US1 in Titusville, I recommend making it 85% sky, just to be sure. You can always zoom in a crop later if you like, but you can’t compensate for missing part of the flight path if you’re aimed too low. Safer is better than sorry, especially if you’ve traveled a very long way to take the photograph.


Camera Settings
Here are the settings I’ve used successfully for a few dozen “streak shots”:
| Camera Settings | |
|---|---|
| Mode | MANUAL |
| ISO | 100 |
| Aperture | f/14 – f/22 |
| Shutter | Bulb |
| Autofocus | OFF — Manually focus to infinity. To confirm focus, shine a light on an object 20–30 yards away and focus on it. Use gaffer’s tape (not duct tape) to lock the focus ring in place. |
Artemis II will be one of the brightest rockets you’ll see. Consider decreasing the aperture by another stop or so (f16 or even f18).
Turn off noise reduction or any other in-camera post-processing. I have found with long exposures like a streak shot, my camera can take 4-5 minutes to complete post-processing and that in turn is a chance for a mistake. That being said, I turn it all off in the camera, and if I need to reduce noise, I’ll do it in my photo editor. Also, turn off any VR (vibration reduction) since the camera will be on a tripod.
Consult your camera manual for directions if you’re not sure how to put it in those settings.
Focusing may be a bit of a challenge, but I’ve found that I can focus my lens fairly easily by first centering on a bright light off on the horizon and then focusing on it, or using the old trick of illuminating something 30-35 yards away with a flashlight and focusing on that. Either method should set your focus to infinity. Lock it down with gaffer’s tape so you don’t defocus accidentally.
Finally. I’ll carefully adjust my composition to what I am looking for, and finally lock the tripod down so it won’t move at all while the photo is being made.
When To Take The Picture
Take a test picture once you have everything set – probably 4-5 minutes of exposure, at least. This will give you the confidence that you’ve set up everything correctly, and if not, you’ll have a chance to fix it before the launch itself. Given that it’s pretty dark, I often will tilt or level the camera a little bit after my first test shot.
For the launch itself, I will often start the photo a couple of minutes before liftoff. This accomplishes a couple purposes: if anything has gone awry, I have a last chance to fix it. Secondly, and most importantly, I like my streak shots to have a bit of color in the sky. The longer the exposure time, the bluer the sky. If there are stars out, they’ll have longer streaks. If there are clouds up in the sky, they will streak a bit too.
It’s really an artist’s choice, however, if you want a darker sky, wait closer to the liftoff to start your exposure. If you want a brighter sky start earlier. Test shots are informative here, and I can’t recommend creating them enough.
Whenever you decide to start, lock the shutter of your camera open, and don’t disturb it at all. It’s time to watch a rocket launch!
The Launch Itself
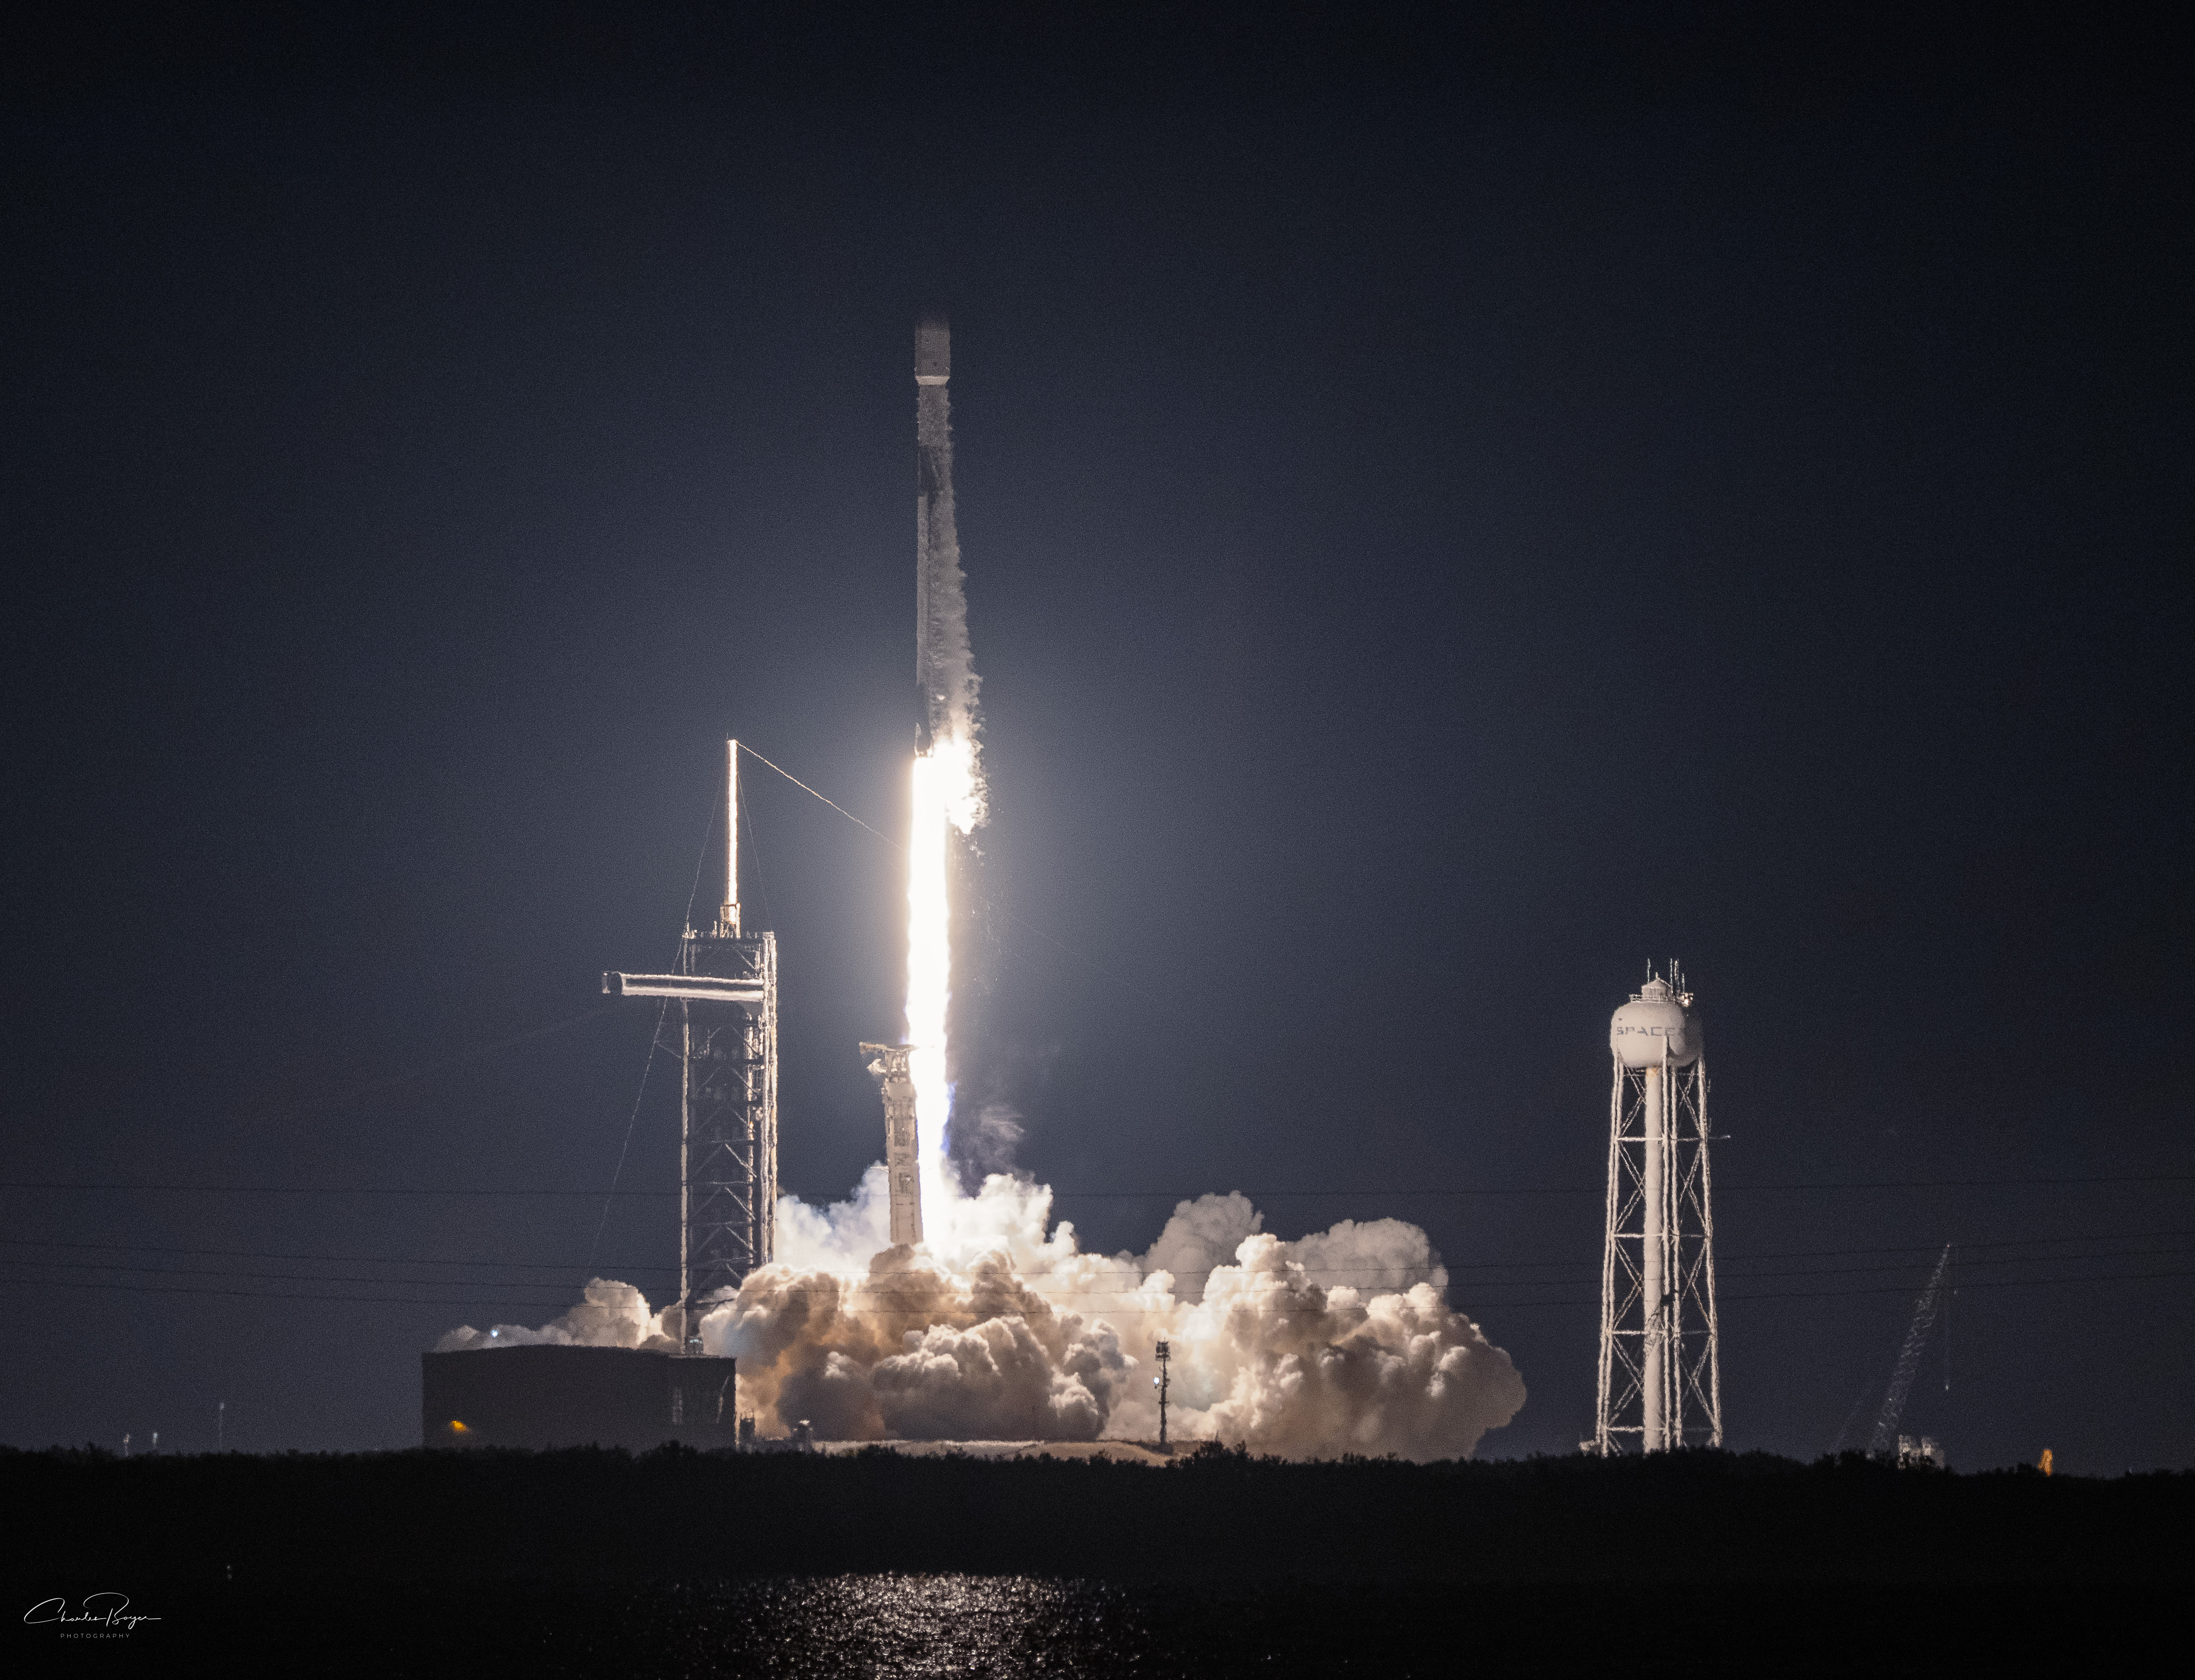
Launches are brightest in the first few seconds of flight, because that’s the closest the rocket will be to you and your camera. It’s one of the reasons I recommend a really high aperture like f20 – you’ll have a much better chance for the first part of the streak not to be “blown out” with a huge blob of light. It’s not aesthetically pleasing to me, so I account for it with the narrow aperture.
The closer you are to the launch pad, the higher your aperture needs to be. If you are 10-12 miles, f14 is fine for Falcon 9.
If you are closer, you might want to be at f18 or f22. If you are farther — for example, in Port St. Lucie, f14 is likely your best bet. Use your judgment, and remember that you can fix things up in your photo editor later if it is a little too dark to suit your tastes.
IMPORTANT: If the rocket used for the mission has solid rocket boosters — Artemis II or Vulcan, for example — you may want to decrease the aperture another stop or so (f16 or even f18).

After the launch, the rocket will appear to rise vertically for at least fifteen and perhaps even thirty seconds, depending on your location and the mission profile. Then it will begin to arc over towards the horizon. At some point, perhaps 45 seconds or so, it will reach its apparent apex and then look like it is descending. Don’t worry, it isn’t dropping, you are just seeing an optical illusion because of the Earth’s curve.
If this is your first launch, you might be surprised at how long it take the sound to arrive to you. You’re close to sea level and that means it takes five seconds for sound to travel a mile. It might be 40-50 seconds before you hear any rumble.

For a SpaceX Falcon 9, the first stage of flight is roughly two and a half minutes. The plume of the rocket will start changing colors a little after two minutes has gone by, and it will be noticeably dimmer than even just a half minute before. It’s truly a beautiful site to behold.
When the rocket stages, there will be a few seconds of darkness from your point of view. Then, you should see the second stage firing up and continuing the mission. It is usually just a little pin-prick of light, but most nights it’s clearly visible.

This is another point where artist’s choice comes into play: you can stop the exposure pretty any time you like, or you can let it continue until you can’t see anything. Some nights, I’ve been able to follow the rocket’s flame plume almost to orbit – about eight minutes. If its hazy, like most summer nights, the light will disappear closer to staging. Every launch is different.
Unlock the shutter lock on your release cable, and let the camera write the file to the storage card and have a look – you’ll be able to immediately get an idea of your results!
Post-Processing
I’m not going to go too deep into this, other than to say it’s a near certainty that you will want to perfect your image in your favorite image editing software.
Me, I usually decrease the highlights a bit, perhaps increase or decrease the contrast, and just generally tweak the appearance of the final photo. Unless I’ve missed the mark wildly exposure-wise (like the time I forgot to turn off Auto-ISO, oops!) the shot will pretty much speak for itself and won’t need too much finagling to get it where I want it to be.
The most important thing in post-processing is getting your settings, focus and composition right in the camera.
The Bottom Line
It’s not hard to take a streak photo, but it does require you to pay attention in your setup. Take care of that, use a wide angle lens that can capture the whole arc and you should be golden. Have fun!
Author: Charles Boyer
NASA kid from Cocoa Beach, FL, born of Project Apollo parents and family. I’m a writer and photographer sharing the story of spaceflight from the Eastern Range here in Florida.


Leave a Reply